Biology · Cell Structure
Viewing as
Teaching this? The teacher view opens every answer and mark scheme.
Microscopy and Magnification
Most cells are too small to see without help. This lesson covers how light and electron microscopes work, how to use a light microscope, and how to calculate magnification and real size.
Learning Objectives
- 1Describe how a light microscope is used to observe plant and animal cells.
- 2Compare light microscopes with electron microscopes in terms of magnification and resolution.
- 3Calculate magnification, image size and real size using the magnification formula.
- 4Explain how electron microscopy has increased our understanding of sub-cellular structures.
Retrieval practice
-
1
What is the function of the nucleus?
Show answerHide answer
It contains the genetic material and controls the cell's activities.
-
2
How many micrometres are there in 1 mm?
Show answerHide answer
1000.
-
3
Which structure in a cell is the site of aerobic respiration?
Show answerHide answer
The mitochondria.
-
4
Which cells have a cell wall made of cellulose?
Show answerHide answer
Plant cells.
Seeing the invisible
The human eye cannot see anything much smaller than about 0.1 mm (100 µm), and most cells are smaller than that. A microscope makes a specimen look bigger, which is called magnification, and also shows more detail, which is called resolution. These two ideas are different, and examiners test the difference often.
Two kinds of microscope
-
Light microscope
Shines light through a thin specimen and uses glass lenses to magnify it. It is cheap, easy to use and can show living cells, but its detail is limited.
-
Electron microscope
Fires a beam of electrons at the specimen. Electrons have a much shorter wavelength than light, so it can magnify much more and show much finer detail, but it is large, expensive and the specimen is dead.
-
Magnification
How many times bigger the image is than the real object.
-
Resolution
How clearly two points that are close together can be told apart. Also called resolving power.
Light microscope and electron microscope compared
Light microscope
- Magnifies up to about ×1500
- Resolution about 0.2 µm (200 nm)
- Specimen can be alive, and colour stains can be used
- Shows nuclei, cell walls and chloroplasts, but not much more
Electron microscope
- Magnifies up to about ×2 000 000
- Resolution about 0.2 nm, about 1000 times better
- Specimen is dead and the image is black and white
- Shows ribosomes, plasmids and the folded inner membranes of mitochondria
Resolution compared
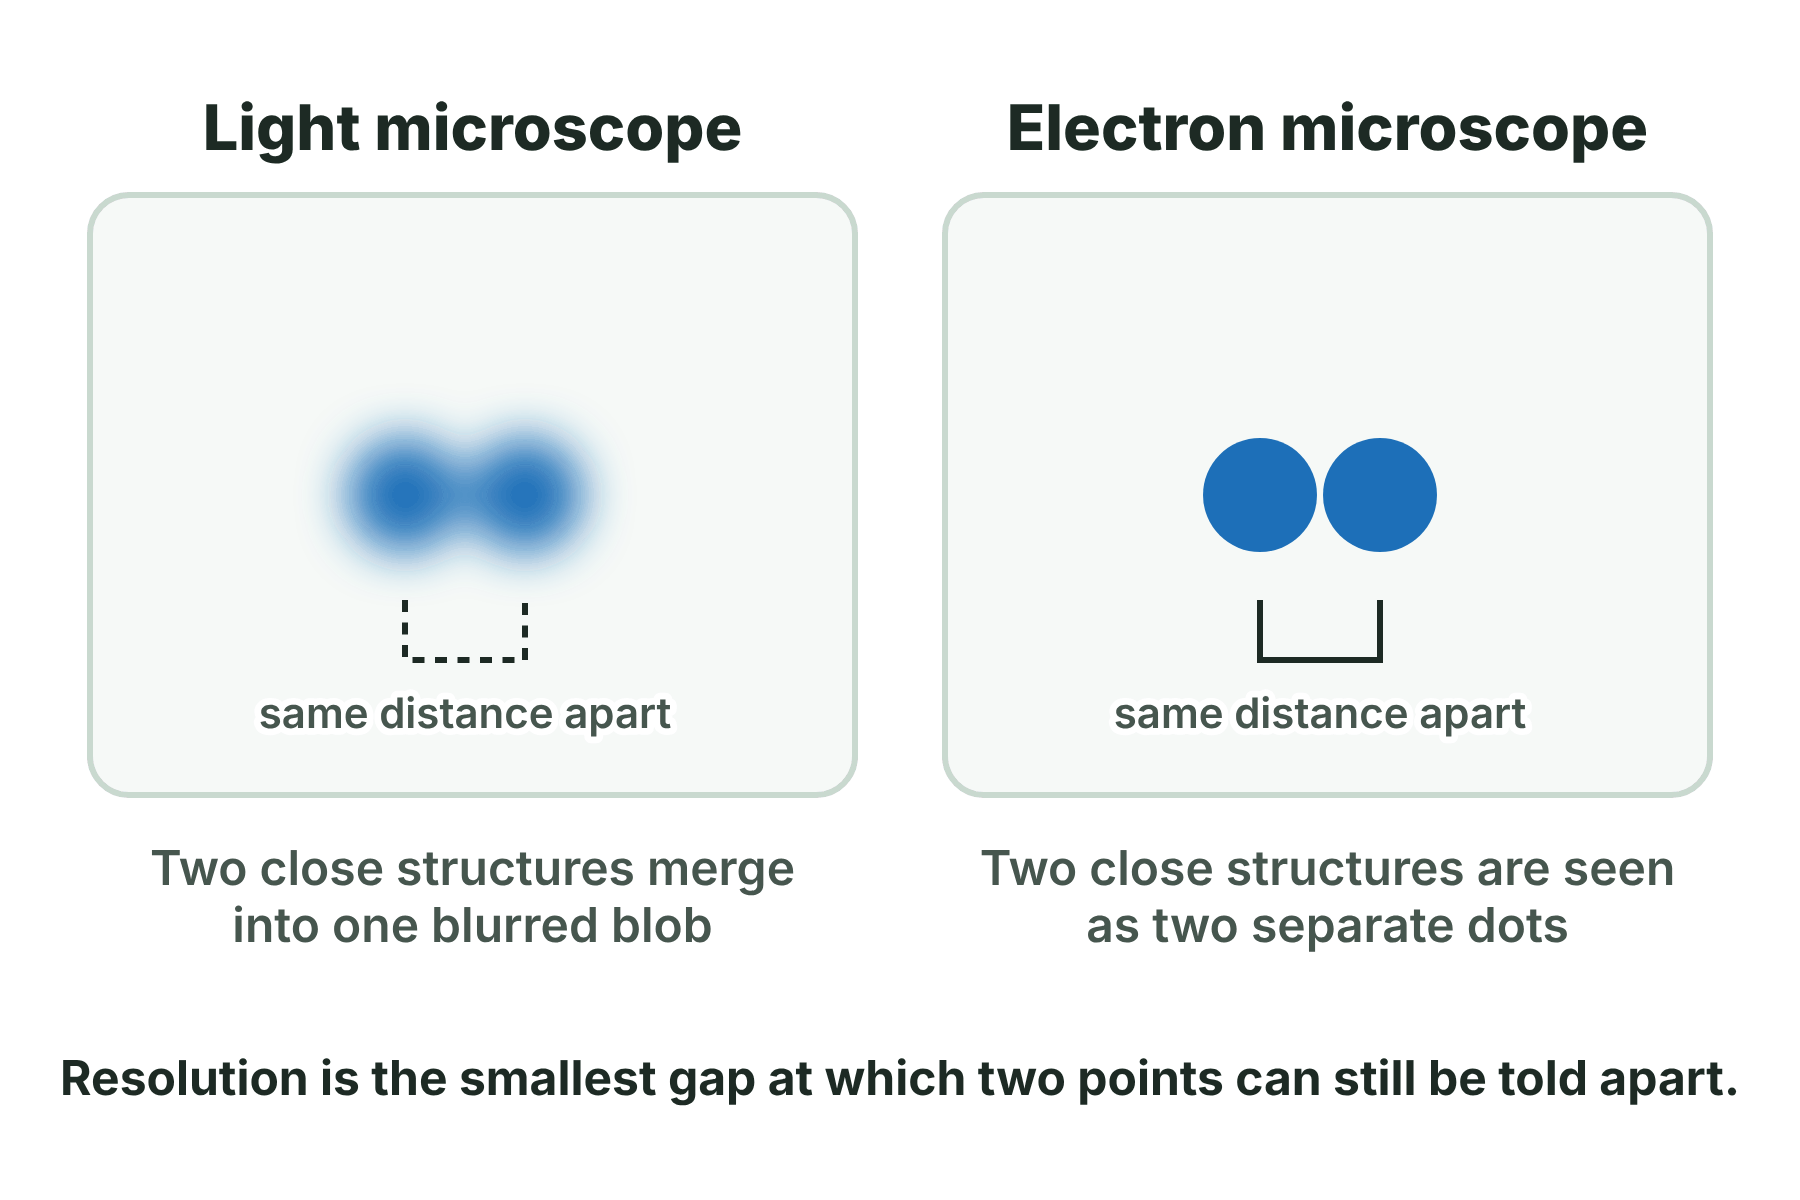
The same two structures: only the electron microscope has the resolution to separate them.
The parts of a light microscope
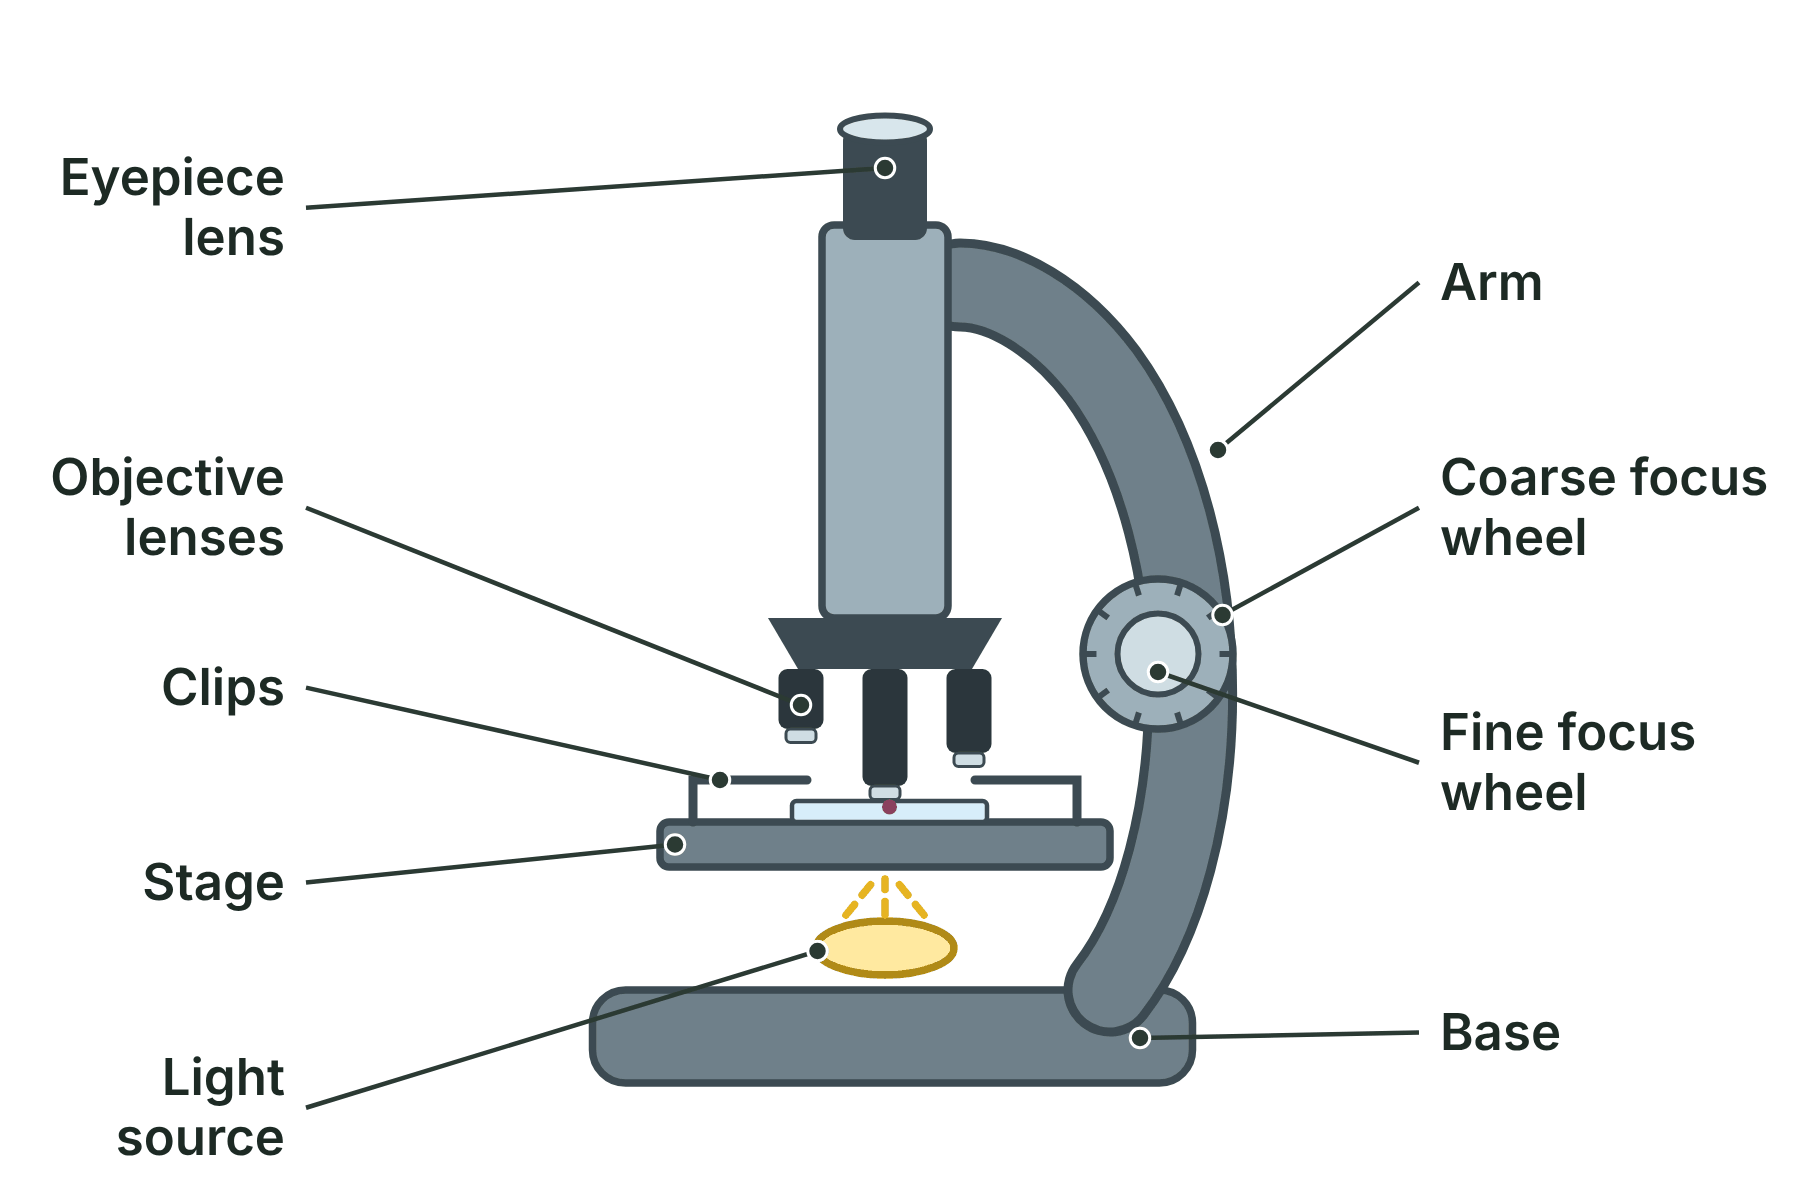
A light microscope. Learn what each part does.
What each part does
You must be able to name the parts of a light microscope and say what each one is for.
-
Eyepiece lens
You look through it. It magnifies the image, usually ×10.
-
Objective lenses
Different strengths, commonly ×4, ×10 and ×40. You choose one by turning the nosepiece.
-
Stage and clips
The stage holds the slide, and the clips keep it from moving.
-
Light source
Lights the specimen from underneath so it can be seen.
-
Coarse and fine focus
The coarse wheel moves the stage a long way to find the image. The fine wheel gives a sharp, clear picture.
Using a light microscope (required practical)
Always start on the lowest power so you can find the specimen.
-
1
Prepare the slide
Put a thin piece of tissue, such as onion skin, on a slide, add a drop of stain such as iodine, and lower a coverslip on at an angle so no air bubbles are trapped.
-
2
Clip it on the stage
Place the slide on the stage and secure it with the clips.
-
3
Choose the lowest power
Turn the nosepiece to the ×4 objective lens, so that most of the slide is in view.
-
4
Focus
Looking from the side, use the coarse focus wheel to raise the stage until the slide is close to the lens. Then look through the eyepiece and turn the wheel the other way until the image is roughly sharp.
-
5
Sharpen the image
Use the fine focus wheel to make the picture clear. Move to a higher power only when you are happy, and refocus with the fine wheel.
-
6
Draw what you see
Use a sharp pencil, clear single lines and no shading. Label the structures and write the magnification beside the drawing.
Calculating magnification
Magnification is how many times bigger the image is than the real object. Always get both sizes into the same units before you divide.
-
The formula
\(\text{magnification} = \dfrac{\text{size of image}}{\text{size of real object}}\), which is \(M = I \div A\).
-
Total magnification
Multiply the eyepiece lens by the objective lens: \(\times 10\) and \(\times 40\) gives \(\times 400\).
-
Units
\(1\text{ mm} = 1000\ \mu\text{m}\) and \(1\ \mu\text{m} = 1000\text{ nm}\). Convert before you calculate.
-
Large and small numbers
Answers are often given in standard form, for example \(2 \times 10^{5}\).
The magnification triangle
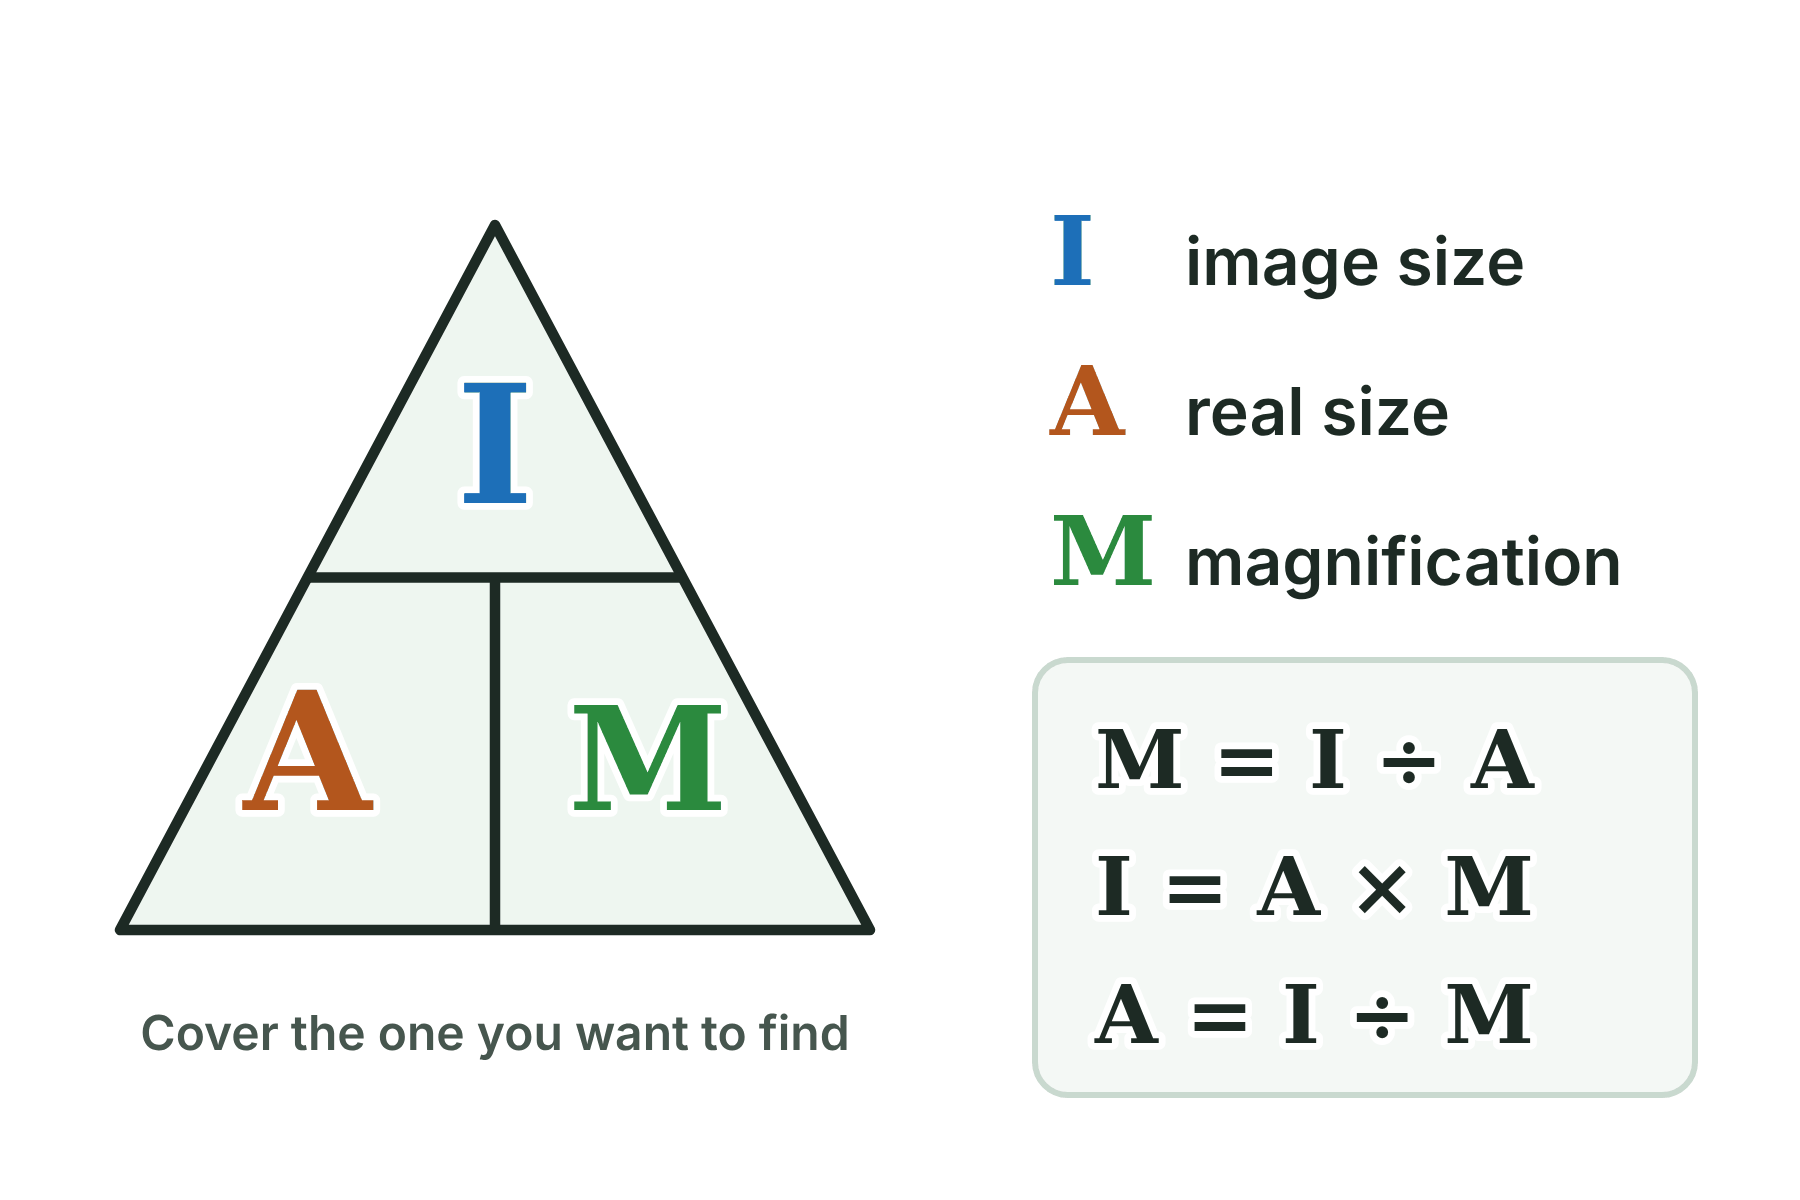
Cover the quantity you want to find, and the triangle shows what to do with the other two.
Calculating the magnification
A student draws a cell that is 36 mm wide in the drawing. The real cell is 12 µm wide. Calculate the magnification of the drawing.
Show the solutionHide the solution
- 1 Convert to the same units Image: 36 mm = 36 000 µm. Real size: 12 µm.
- 2 Write the formula \(M = \dfrac{I}{A}\)
- 3 Substitute and calculate \(M = \dfrac{36\,000}{12} = 3000\), so the drawing is \(\times 3000\).
AnswerThe magnification is ×3000.
What magnification means
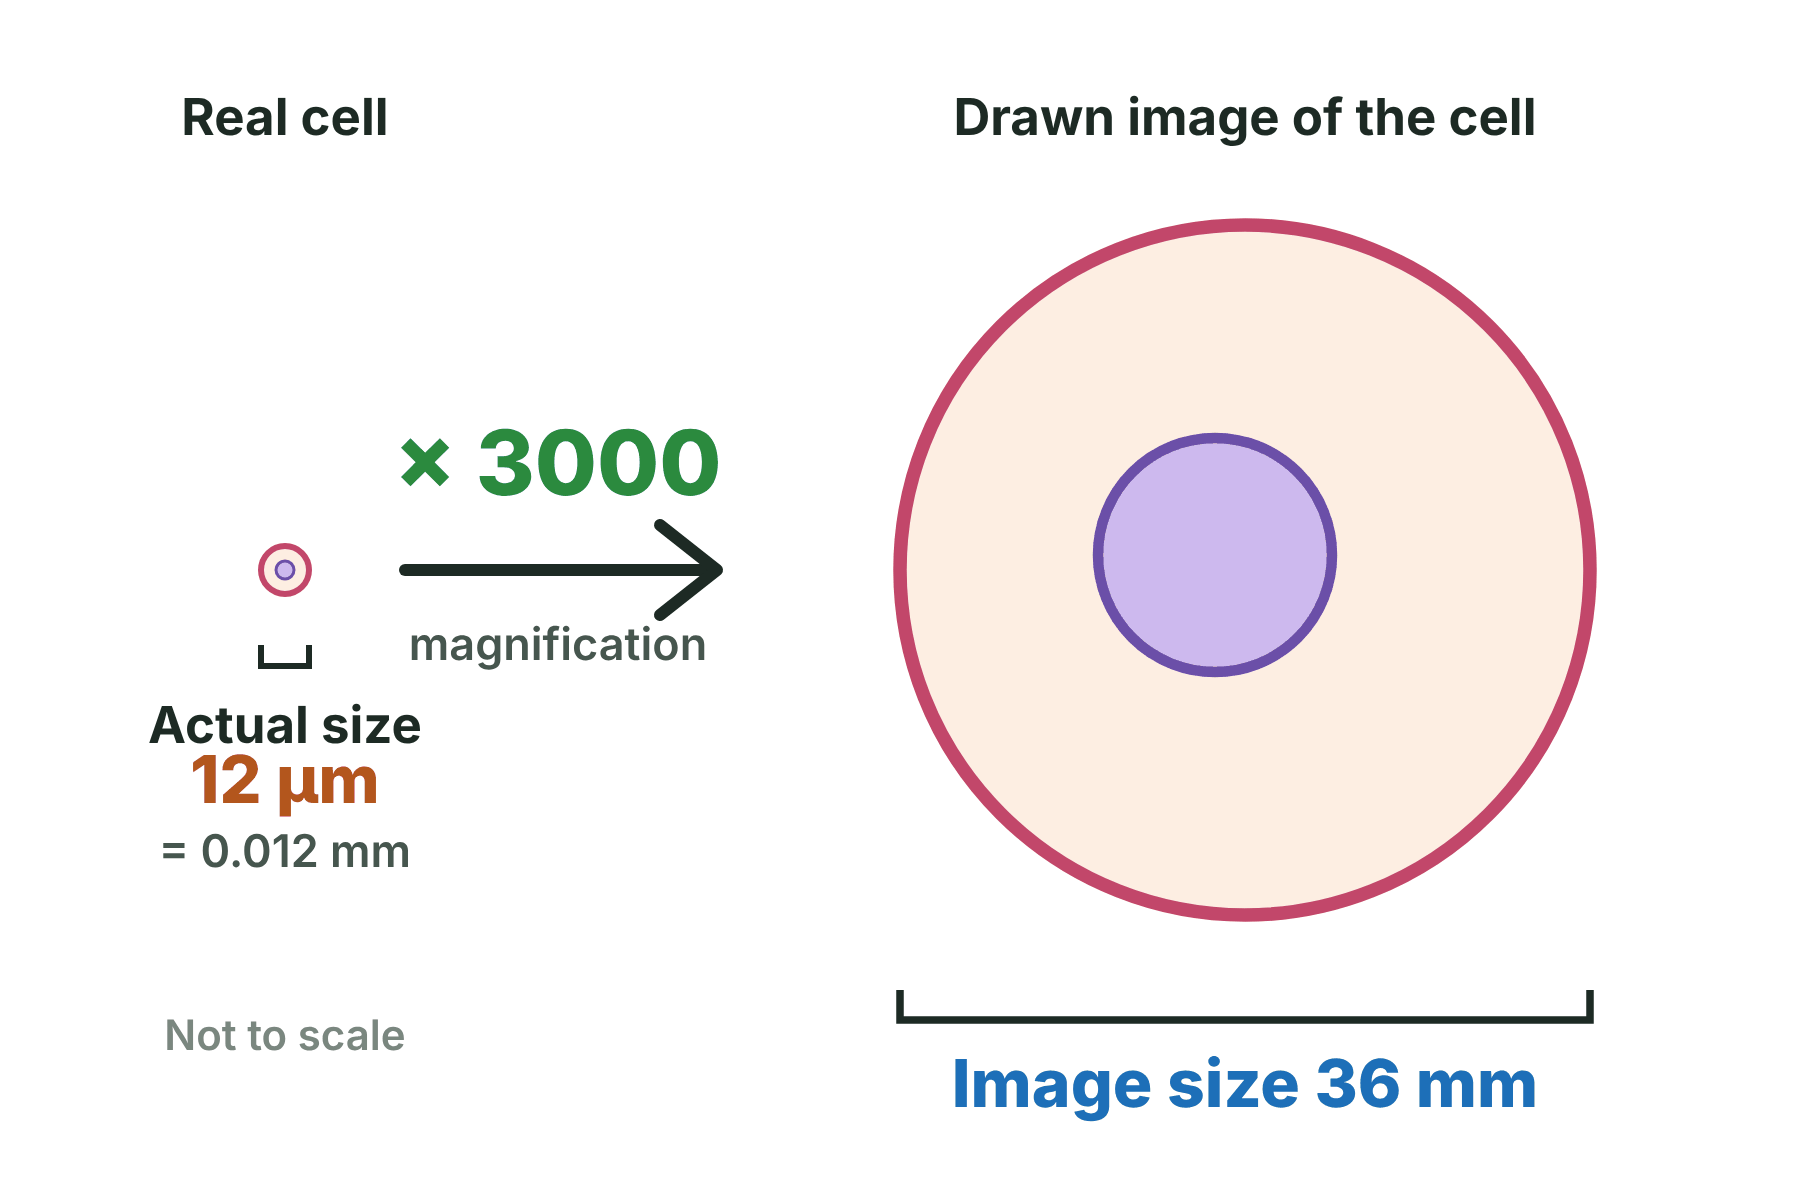
Image size 36 mm and real size 12 µm give a magnification of ×3000.
Calculating the real size of a cell
A photograph of a cell shows it as 54 mm wide. The magnification is ×1500. Calculate the real width of the cell in micrometres.
Show the solutionHide the solution
- 1 Rearrange the formula \(A = \dfrac{I}{M}\)
- 2 Substitute \(A = \dfrac{54}{1500} = 0.036\text{ mm}\)
- 3 Convert the units \(0.036\text{ mm} \times 1000 = 36\ \mu\text{m}\)
AnswerThe real width is 36 µm.
Case study
How electron microscopes changed biology
Until the 1930s, scientists could study cells only with light microscopes, which cannot show anything smaller than about 0.2 µm. The first electron microscopes, built in the 1930s, could do much better. They revealed the ribosomes where proteins are made, the folded inner membranes of mitochondria, and the stacks inside chloroplasts. Knowing these structures in detail explained how respiration, photosynthesis and protein production really work.
Do not mix them up
Magnification makes an image bigger. Resolution makes it clearer.
An image can be magnified a million times and still be blurred if the resolution is poor.
Microscopy
Microscopy
-
Light microscope
- up to ×1500
- living cells
- cheap
- resolution 0.2 µm
-
Electron microscope
- up to ×2 000 000
- dead specimens
- resolution 0.2 nm
-
Magnification
- image size ÷ real size
-
Resolution
- clarity: separating two close points
-
Units
- 1 mm = 1000 µm
- 1 µm = 1000 nm
Summary and exam focus
- A light microscope uses lenses and light and can show living cells up to about ×1500.
- An electron microscope has much higher magnification and resolution, so it shows far finer detail.
- Magnification equals image size divided by real size, with both in the same units.
- Always begin on the lowest power and focus with the coarse wheel before the fine wheel.
- Electron microscopes revealed ribosomes, plasmids and the inside of mitochondria.
Exam focus
Explain how electron microscopy has increased our understanding of sub-cellular structures. (4 marks) (4 marks)
Name a structure the light microscope cannot show, link it to the electron microscope's higher resolution, and say what scientists learned from it. Use the words magnification and resolution correctly.
Key terms
The words this lesson expects you to use. Each one is linked from the first place it appears above.
- Magnification
- How many times bigger an image is than the real object.
- Resolution
- The ability to see two points that are close together as separate. Also called resolving power.
- Light microscope
- A microscope that uses light and glass lenses to magnify a specimen.
- Electron microscope
- A microscope that uses a beam of electrons, giving much higher magnification and resolution.
- Eyepiece lens
- The lens you look through, usually ×10.
- Objective lens
- The lens just above the specimen, giving different magnifications.
- Stage
- The platform on which the slide is placed.
- Stain
- A coloured chemical, such as iodine, that makes parts of a cell easier to see.
- Specimen
- The object being looked at under a microscope.
You've finished the notes
Check your understanding
Test yourself while it is fresh. Start with the flashcards, then try the exam questions.
Something here looks wrong?
Tell us what and we will go and look. It goes to whoever writes these pages, nobody else, and we do not ask who you are — so there is nothing to sign and nothing comes back to you.